This fantastic art wall is a little DIY I've been kicking around in my head for a few months now so finally last week I jumped out of bed one day and said to myself, "today's the day!" and in less than 48 hours I had a whole new wall of skinny shelves. Now I can change up and switch out the art on my studio wall to my heart's content. Hooray!
Before:
Blah! Needs more variety!
After:
Materials:
- hammer
- electric drill
- paint
- paintbrush
- level (optional)
- stud finder (optional)
- spackling & scraper (optional)
- two clamps
- saw
- pencil
- tape measure
- 3/4" wood tacks
- 3" wood screws
- medium fine sand paper
Wood Selection:
- 2" slat board
- 1 x 2" wood
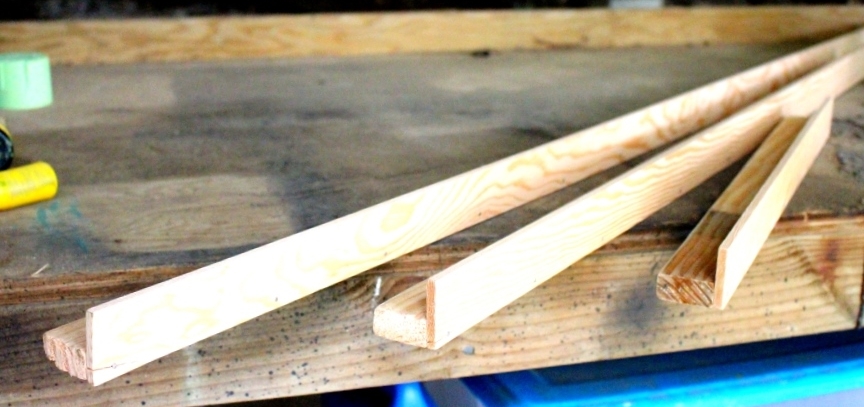
You will need to measure your wall to decide what increments will look best in your space. My shelves are 60", 40", and 20" long and I chose to do a staggered pattern. Make sure you select wood that is nice and straight without blemishes so it will look really smooth after it's been painted.
Let's Get Going!
1 - Cut the wood. First things first, measure the wall space and determine the length and position of your new fabulous skinny shelves. Once you have decided, measure and cut your slat and 1 x 2" wood to match exactly. Sand all the edges til the wood is smooth to the touch.
2 - Clamp wood together. Using the two clamps, line up your wood in an 'L' shape with the bottom of the backside of the slat lined up with the bottom of a 1" side of the wood (see photo).
3 - Affix wood together. Carefully hammer tacks every six inches or so to secure the lip of the shelf to the base.
4 - Admire your handiwork! Yay!
5 - Paint the shelves. Once they are all put together, the shelves are ready to paint. I split my paint job up into two steps. First step is painting the inside lip and underneath area (basically all but the tiny side that goes against the wall and the large front side). Let dry completely according to your specific paint instructions.
[Tip: I have learned after doing numerous projects like this that it is best to paint the non-focal point areas first because when painting something that is 3D with angled sides, your paintbrush will often slightly go over the intended side's edge and create brushstrokes on another side. If you paint the 'good' side last then any wayward strokes will be less noticeable.]
6 - Finish painting. After letting the paint dry from the previous step, go ahead and flip your shelves over and paint the front side nice and neatly. Let dry.
Um yeah, so before I go on, I think a FULL DISCLOSURE is in order. Hopefully you saw my sketchbook making tutorials a few months ago and you remember my whole 'measure at your leisure' mantra. Well the same kind of rule applies here; be as perfect (or not!) as you like while building these. If you have a level, now's the time to use it. If you don't, just make multiple marks for the shelf placement when measuring from the ceiling or floor. Same with the stud finder; use it if you have one, wing it if you don't. I could kind of see where some of the wood posts are in my wall because of a slight crease. I also know that beams are usually placed 16 inches apart, so I just kind of guesstimated and seemed to do pretty well when drilling the shelves in. Plus, the way I figure it, these are never going to have much weight on them so I'm not terribly worried about them ripping out. You can be as precise as you like on this.
7 - Hanging the shelves. Now is the time when you'll need a buddy. Mark and measure on the wall where you want your shelves to hang. Deciding where the screws go is something you will want to use the stud finder for if you have one.
[Tip: It's kind of a lot easier to half screw in your wood screws while holding your shelves on the ground or on your work table, then finishing up in the wall. Ten times easier if you decide to actually drill holes first as well!]
8 - Polishing up your work. Ok so here's another 'preference' step. Because this is just my private home studio that very few people see, compounded with the fact that we rent and will have to take these shelves down one day, I opted not to use putty to smooth out the screws on the face of my skinny shelves. If I were doing shelves that would be permanent or seen more, I would use drywall spackle to disguise and smooth out the screws, then the sandpaper to prep it for one final paint layer. Either way, once you are satisfied with the look of your shelves, do one final layer of paint and voila! You have transformed your studio into a workable space capable of keeping up with your creative eye's inspo.
Oops! Even tiny splits can just be filled in with paint.
Hooray!!!!
As you know, loyal reader, I am still quite fresh at making tutorials, so please feel free to let me know how I did explaining this today. Any critiques welcome! And please let me know in the comments if you were able to do a skinny shelf revamp of your own! I would love to see pics too:)
Love to DIY? Follow this Pinterest board for more high quality crafty art inspo
--
originally posted: January 17, 2017


